
8 min read
Nov 26, 2025
Complete flashing guide featuring material comparisons, step-by-step installation processes, and troubleshooting tips, designed to help readers make informed decisions about roof waterproofing solutions.
Roof flashing is a critical but often overlooked part of a roofing system. It’s a thin metal barrier installed around joints, edges, and openings to direct water away from vulnerable areas. Without it, moisture can seep in, leading to leaks, mold, and structural damage.
Roof flashing is a thin metal barrier that seals the joints and edges of the roof to keep water out. It is essential to prevent leaks around chimneys, skylights, and walls.
Flashing protects not just the roof but everything beneath it – insulation, framing, and drywall. This guide covers the key types of flashing, where they’re needed, and how they should be installed to keep your home protected.
Choosing the right material for your roof flashing depends on your climate, budget, and the length of time you plan to stay in your home. Let’s start with aluminum. It’s lightweight, easy to install, and won’t break the bank. It resists rust, which makes it a smart choice for many moderate climates. However, it won’t last forever – expect it to last around 15 to 20 years before it needs replacement. If you’re on a tight budget or working on a rental or short-term property, aluminum makes sense.
On the opposite end of the spectrum is copper. This is the high-end choice. It’s beautiful, strong, and practically immune to corrosion. Over time, it develops a green patina that gives homes – especially older or historic ones – a timeless look. The downside? It’s expensive. But copper can easily outlast the roof itself, often lasting more than 50 years with minimal maintenance.
Somewhere in the middle is galvanized steel. It’s strong, versatile, and well-suited to most residential applications. It can handle a variety of climates and is more affordable than copper while offering more durability than aluminum. Like any steel product, though, it can rust over time, especially if the protective zinc layer wears down.
To help compare your options at a glance, here’s a quick breakdown of each material’s strengths and weaknesses:
|
Material |
Cost |
Durability |
Climate Suitability |
Installation Difficulty |
|
Aluminum |
Low |
Medium |
Moderate |
Easy |
|
Copper |
High |
Excellent |
All climates |
Moderate |
|
Steel |
Medium |
Good |
Most climates |
Easy |
This balance of cost, performance, and installation complexity is key when making a smart, long-term decision for your roof.
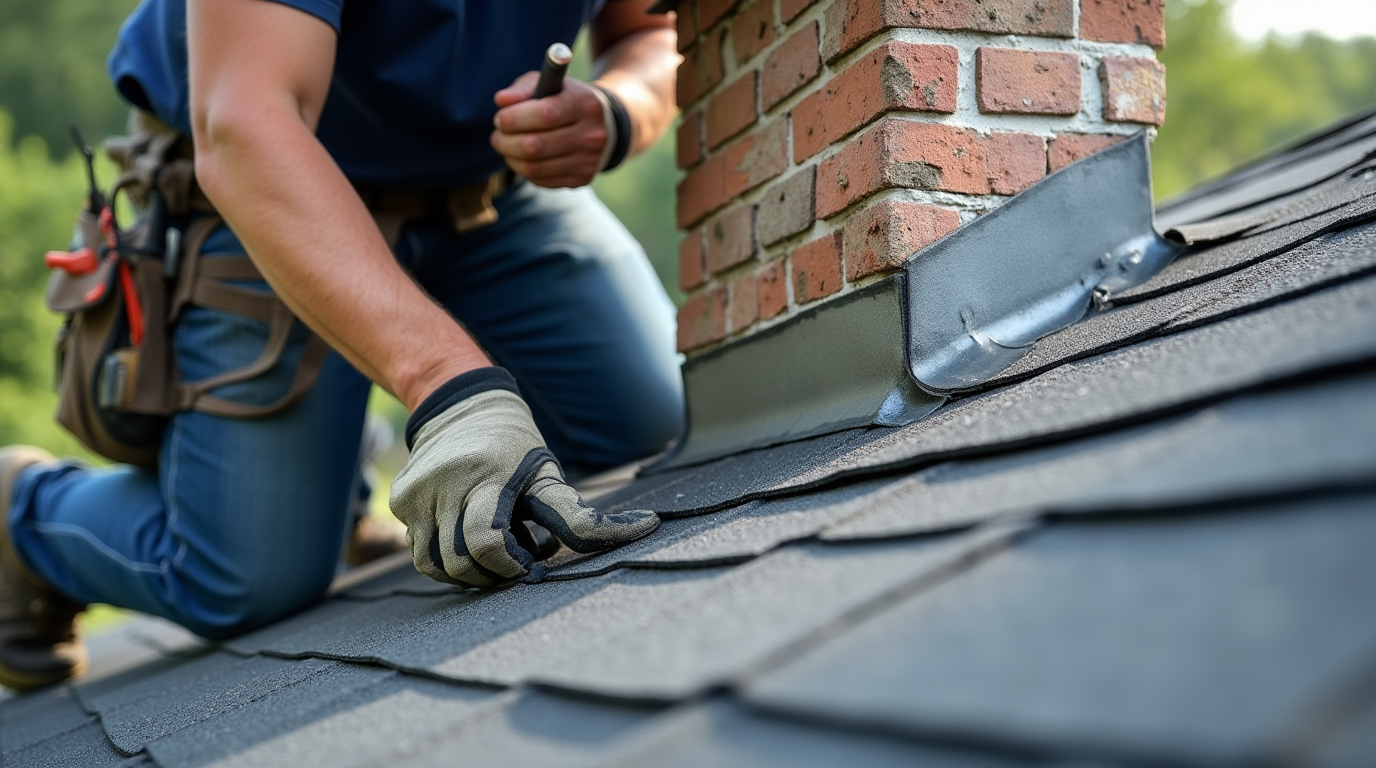
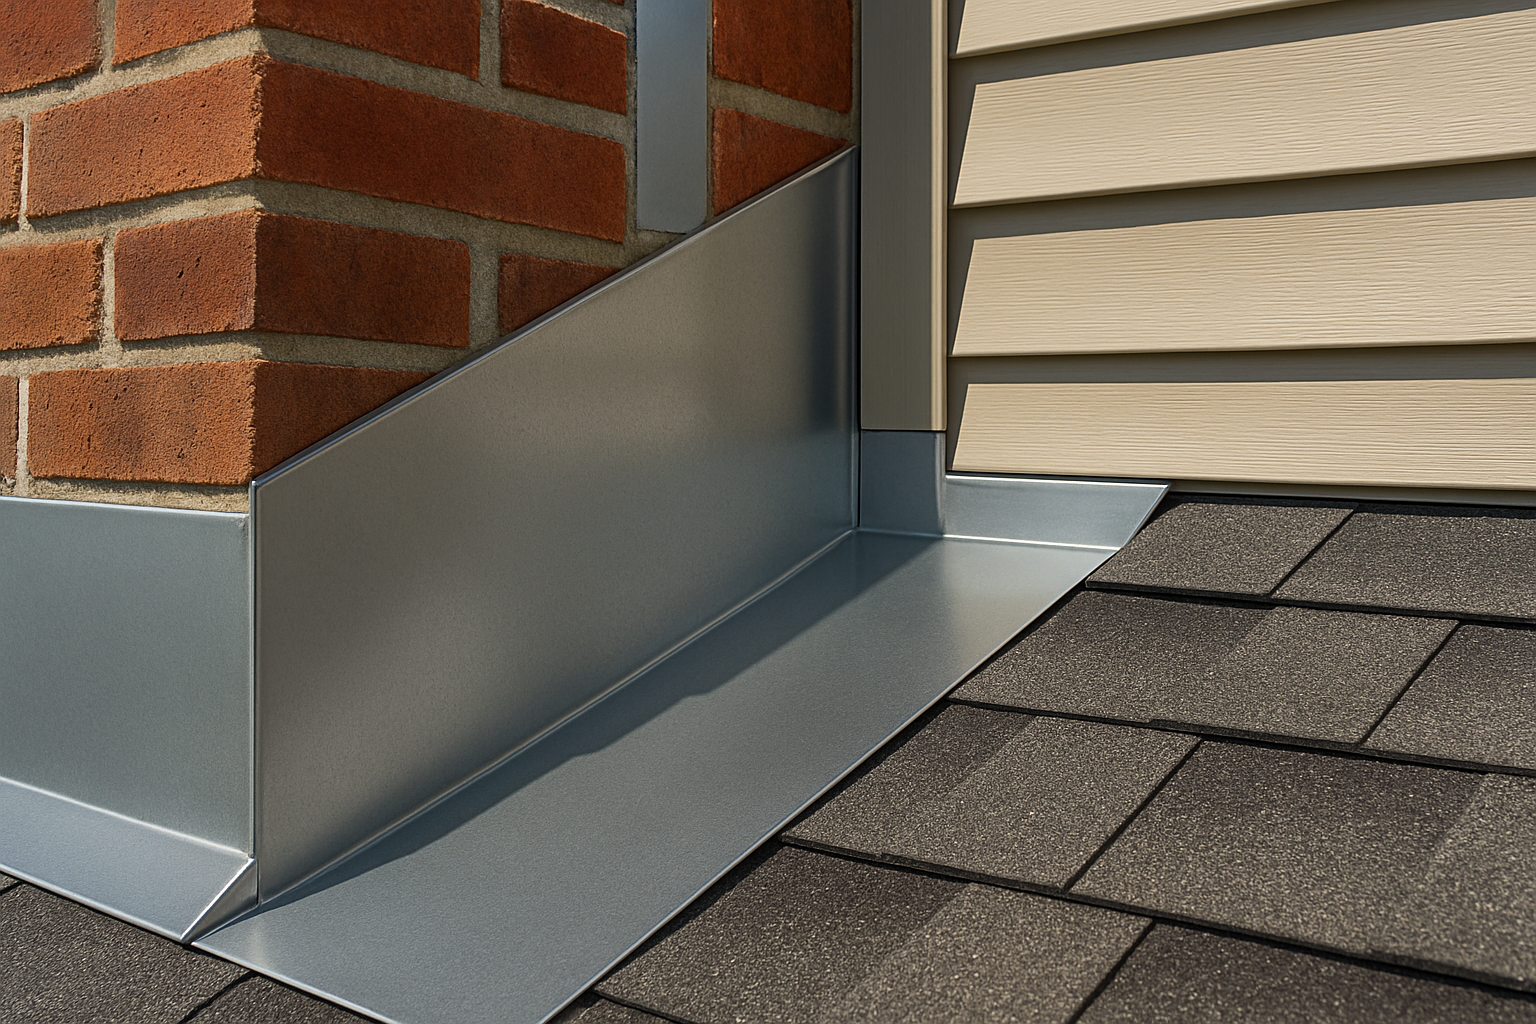
Chimneys are usually the number one trouble area. They penetrate through the roof, creating a natural weak spot for leaks. Proper flashing around a chimney typically involves both base flashing – attached to the roof – and counter flashing – embedded into the chimney itself. This dual-layer system helps prevent water from seeping behind the brick or siding.
Skylights bring light and style to a space, but without the right flashing, they also bring water. These roof openings require custom flashing kits or factory-supplied systems, carefully installed around all sides to prevent leaks at the seams where glass and roof meet. Even a small gap or poorly sealed edge can cause major interior water damage.
Where two roof slopes meet, water naturally collects and channels downhill. These valleys are under constant stress during storms and snowmelt. Metal flashing laid in these troughs is essential to catch and redirect the flow before it can penetrate the roofing layers. It must be precisely installed and sealed to avoid pooling and backup.
Any place where the roof meets a vertical wall – like dormers, second-story walls, or side extensions – needs step flashing. These are overlapping L-shaped pieces installed with each layer of shingles, forming a zigzag seal between the roof and siding. Without this, water runs down the wall and straight into the roofing layers.
Other parts of the roof shouldn’t be ignored. Plumbing vents, exhaust pipes, and HVAC lines all penetrate the roofing surface and require flashing boots or collars to prevent moisture from entering. The edges of the roof – especially eaves and rakes – need drip edge flashing to direct water away from the fascia and prevent wind-driven rain from creeping under the shingles.
Transitions between different roofing materials, such as where the asphalt meets metal or flat meets sloped, require specialized flashing details to bridge the height and texture differences. And don’t forget any mounted equipment – satellite dishes, solar mounts, antennas. These all disrupt the roof surface and must be sealed tight with the right flashing to prevent leaks from forming around mounting points.
When you look at your roof, every intersection, opening, or material change is a potential weak spot. Flashing is the system that ties it all together and keeps water out where it matters most.
Not all flashing is the same. Depending on where it’s installed and what it’s protecting, flashing takes different shapes, sizes, and installation techniques. Here are the eight most commonly used types – and why each one matters.
This is one of the simplest forms of flashing: a long, straight strip of metal that protects where a vertical surface meets a sloped roof, such as along a dormer wall. It creates a solid barrier to prevent water from running down the slope. Because of its length, continuous flashing must include expansion joints to prevent buckling during temperature swings. Labor typically runs between $5 and $8 per linear foot.
Used at the base of vertical structures like chimneys or parapet walls, base flashing is the bottom part of a two-piece flashing system. It works together with counter flashing to ensure complete protection. The base piece is installed on the roof deck and sealed in place, providing a waterproof foundation. Labor costs for base flashing range from $6 to $10 per linear foot.
This is the top layer in the two-part system and is often installed above the base flashing in the masonry or siding. It overlaps the lower section, shielding it from direct exposure to rain and wind. Properly embedded counter flashing protects the underlying sealant and prevents water from backing up behind the base layer. Expect labor costs of $4 to $7 per foot.
One of the most effective methods for protecting wall-to-roof connections, step flashing is installed piece by piece alongside shingles. Each L-shaped piece is layered with a shingle above it, creating a stair-step water barrier. This method allows for flexibility and expansion and is easy to repair if needed. Step flashing installation typically costs between $7 and $12 per foot due to the added labor.
Skylights are custom components that demand a specific flashing solution. Most come with a manufacturer-supplied kit that matches the skylight’s design. These systems wrap around all sides and integrate with the shingles or tiles. Done right, they eliminate leaks at corners and lower edges, which are common failure points. Installation runs from $150 to $300 per skylight, depending on roof pitch and complexity.
When two roof planes meet to form a valley, you need flashing that can handle a high volume of water. Valley flashing is usually installed under shingles and is visible only in “open valley” designs. It protects the internal angle and helps move water down and out quickly. Costs range from $8 to $15 per foot, depending on the roof configuration.
This flashing is installed along the edges of the roof – specifically at eaves and rakes. At the eaves, it goes under the underlayment; at the rakes, it goes over. This prevents water from getting under the roofing system and protects the fascia from rot. It also gives a crisp, finished look to the roofline. Installation is relatively quick and affordable, typically costing $2 to $5 per linear foot.
Often overlooked but absolutely critical, kickout flashing is used where a roof edge meets a vertical wall and diverts water into the gutter. Without it, water can run down the siding and soak into walls, especially during wind-driven rain. It’s a small piece with a big job – and a small price compared to the damage it prevents. Installation usually costs between $15 and $25 per piece.
Each of these flashing types serves a specific purpose. Skipping even one can leave your roof vulnerable in ways that might not show up until the next heavy rain. A well-flashed roof is one where every detail is covered – literally.
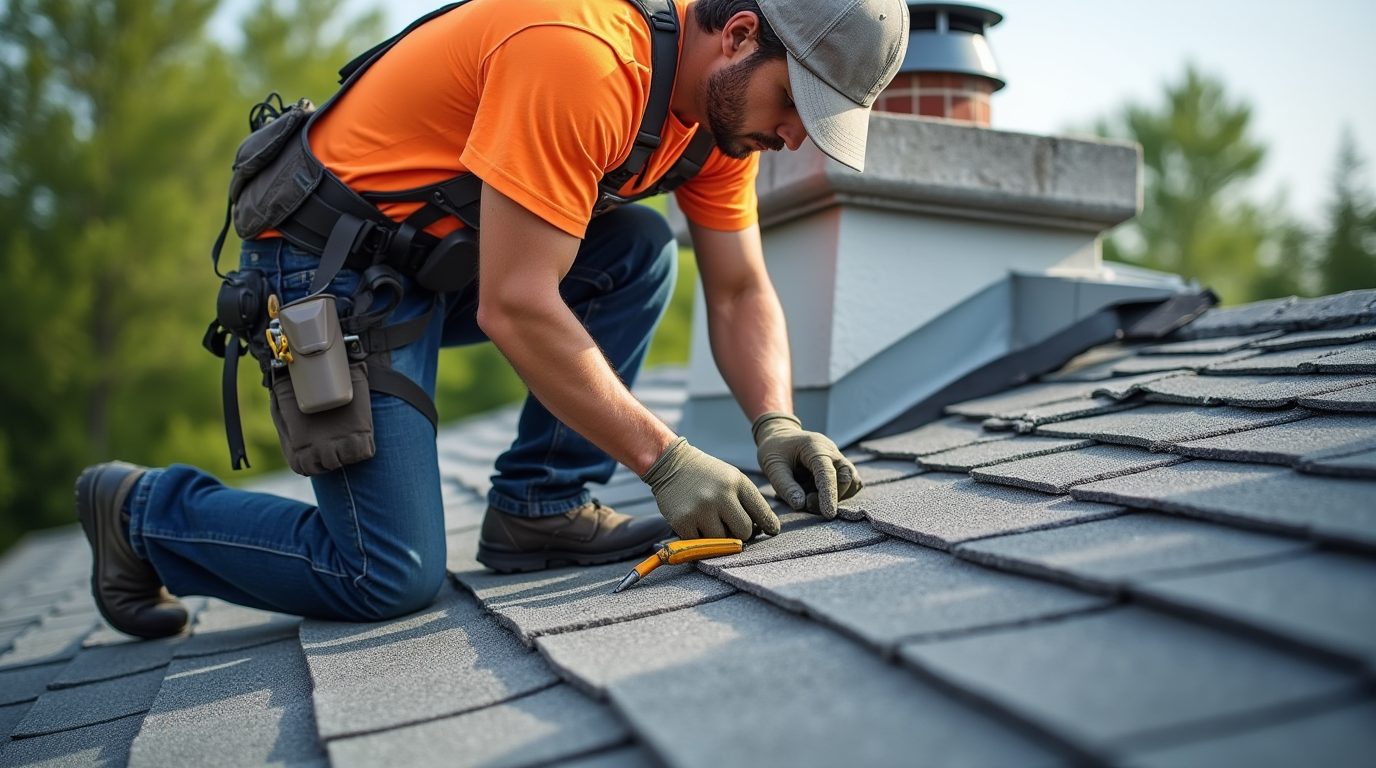
Flashing isn’t just about choosing the right material – it’s about installing it correctly. Even the best metal won’t protect your home if it’s installed incorrectly. Let’s break down the process from prep to final nail.
Before flashing is installed, the roof must be inspected. Damaged decking, sagging areas, or signs of past water intrusion must be addressed first. Once the roof’s condition is verified, it’s time to choose materials based on climate, budget, and the type of flashing needed for each section.
Calculating the amount of flashing required is the next step – this involves measuring all roof edges, valleys, penetrations, and wall junctions. Next, prepare the tools: metal snips, roofing nails, caulk or sealant, a chalk line, and protective gear.
No matter the type, good flashing installation follows a few non-negotiable rules. First: overlap. Each piece must overlap the one below it to direct water outward – not trap it. Second: water must always flow over flashing, never under. Third: sealing. Every joint, nail hole, and connection must be properly sealed with roofing-grade caulk or compatible tape. Finally, fastening. Nails or screws must be correctly placed and not overdriven. Improper fastener placement is one of the most common sources of leaks.
Each flashing type has its own sequence. For step flashing, you alternate between shingle and flashing, nailing each piece high on the wall side and embedding it under the next shingle. For valley flashing, you install the metal strip first, then add shingles over it in an open or closed layout, depending on design.
With counter flashing, you first install the base flashing on the roof. Then, cut a groove into the chimney or wall mortar joint and embed the counter flashing, folding it over the base. The seal between them should be tight, with no room for water to sneak in.
Skylight flashing must be installed exactly according to the manufacturer’s guide. Typically, the bottom piece goes on first, followed by the sides, then the top – each overlapping the previous to encourage drainage. Kickout flashing, meanwhile, is best installed as part of step flashing and nailed securely into the wall sheathing, not just the siding.
Improper overlaps, sealing only with caulk, skipping underlayment, or mixing incompatible metals – these are mistakes we see far too often. Flashing isn’t an area to cut corners. Every piece should be installed as if it’s the first line of defense – because in heavy rain, it is.
Done right, flashing becomes part of a watertight system that quietly protects your home for decades. Done wrong, it becomes a silent source of slow damage. Don’t take that chance.
Roof flashing doesn’t exist in a vacuum – it’s always part of a system. And when metals come into contact with each other, chemistry matters. Choosing the right combinations can extend the life of your flashing. The wrong pairings, however, can cause galvanic corrosion, where one metal begins to corrode the other. It’s a slow but destructive process that ruins roofs from the inside out.
Some materials naturally work well together. Aluminum flashing, for example, should always be used with coated steel fasteners to prevent chemical reactions. Copper works best with copper or stainless steel fasteners. Mixing it with cheaper metals can cause aggressive corrosion. For steel flashing, galvanized fasteners are the safe bet – they match the coating and won’t accelerate decay.
Certain combinations should never be used. Aluminum and copper are a well-known disaster – when they touch, corrosion happens fast. Steel and copper are another bad match. Even galvanized steel can suffer if installed near copper. The zinc layer deteriorates rapidly when exposed to copper runoff, especially during rain.
When in doubt, match metals or use compatible fasteners as specified by manufacturers. It’s a small detail with big consequences if ignored.
Your roof doesn’t exist in a lab – it lives through weather every day. A flashing system that holds up in Arizona might fail quickly in New Jersey. That’s why regional climate plays a big role in material selection and design.
In regions with mild temperature swings and moderate precipitation, both aluminum and galvanized steel perform well. Standard flashing thickness and basic corrosion protection are usually enough. These climates don’t place extreme stress on materials, so cost-effective choices can work without compromising durability.
Homes near the ocean face constant exposure to salty air and humidity. Corrosion resistance becomes critical. Copper and stainless steel are the top choices here. While more expensive, they handle salt spray without breaking down. Marine-grade coatings may also be necessary on fasteners and accessories.
In areas with wide temperature swings, ice dams, and heavy snowfall, the roof requires sufficient room to expand and contract. Expansion joints are a must, especially for continuous flashing. Thicker-gauge materials like premium galvanized steel or copper are recommended. These hold up better against cracking, shifting, and thermal stress.
Here in southern New Jersey, we see hot, humid summers, cold winters, and frequent storms – including nor’easters and occasional hurricanes. That means flashing must handle moisture, wind, ice, and thermal movement. For most residential homes in this area, we recommend galvanized steel or copper, depending on budget. Aluminum can work in less exposed areas, but needs extra care to avoid corrosion. Flashing should also be installed with durable fasteners and sealed to resist driving rain and wind uplift.
Choosing materials that match your local conditions isn’t just smart – it’s essential for long-term protection.
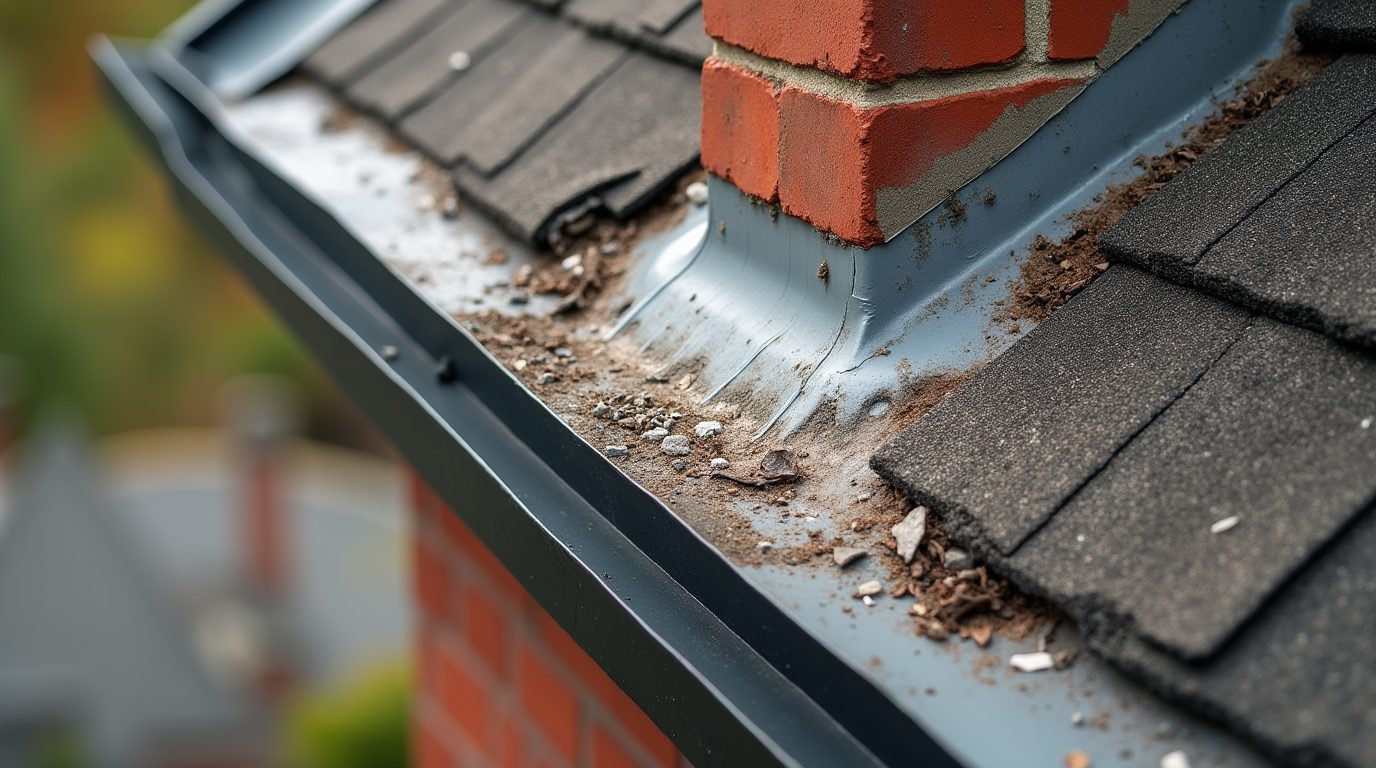
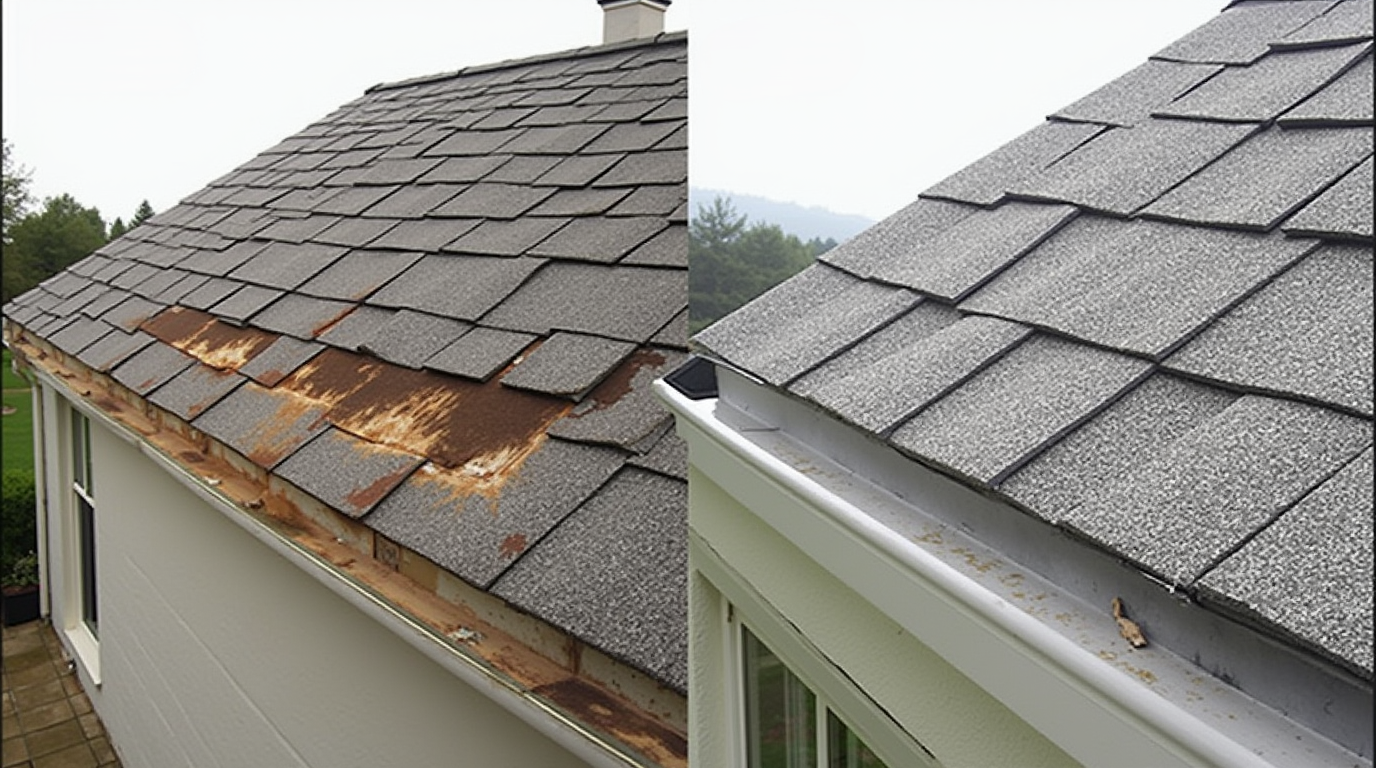
Even the best flashing doesn’t last forever. Over time, it can warp, rust, crack, or simply pull away from the surface. Knowing what to look for – and when – is the first step in catching problems early, before they turn into costly repairs.
Start with the visible clues. Rust stains, cracked edges, separation from the surface, or missing sections of metal are obvious red flags. But not all damage is on the outside. Water stains on ceilings or walls, mold in the attic, or peeling paint near rooflines can all signal flashing failure. Discoloration around chimneys or skylights is often a giveaway that something’s gone wrong beneath the surface.
Loose nails or fasteners are another warning sign. Flashing that moves or rattles in the wind isn’t doing its job. Look for warped or lifted shingles nearby – this could mean water is already getting underneath.
Regular inspections help catch these issues before they escalate. In spring, check for damage caused by ice dams or freeze-thaw cycles. Summer storms can test your flashing’s resistance to wind and heavy rain, so a mid-year check is smart. In fall, prepare for winter by clearing debris and ensuring seals are intact. And during winter, keep an eye out for snow buildup that could force water under the flashing.
If you’re comfortable getting on the roof – or using binoculars from the ground – you can spot most basic issues yourself. Start by checking all flashing elements for visible damage or corrosion. Inspect fasteners and sealants to make sure nothing’s loose or dried out. Verify that water is flowing away properly and not pooling around flashing. Also, look at the roofing material adjacent to flashing, as damage there often indicates deeper problems.
Catching flashing problems early can save thousands in water damage repairs. If you’re not sure what you’re looking at, don’t guess. Call a licensed roofing contractor and get a professional assessment. A few hundred dollars in preventive work can save you from major headaches down the line.
Roof flashing isn’t set-it-and-forget-it. Even if it was installed perfectly, it still faces wind, rain, sun, snow, and constant expansion and contraction over time. Without routine maintenance, even the best materials will eventually fail. The good news? A simple maintenance plan can keep your flashing in top shape for decades.
At a minimum, flashing should be inspected twice a year – typically in spring and fall. Remove any debris, leaves, or branches that may have collected around roof edges, valleys, and chimneys. These can trap moisture and accelerate corrosion or rot in adjacent materials.
Check fasteners to make sure they haven’t backed out or loosened. Loose nails or screws allow flashing to lift, breaking the seal and letting water in. If sealant has dried out, cracked, or peeled away, reapply a roofing-grade product designed for your flashing material.
For copper or galvanized steel, a protective coating can be applied every 5 to 10 years to extend the life of the metal – especially in coastal or high-pollution environments. These coatings help reduce oxidation and preserve appearance.
If you discover a leak or damage, don’t wait. Temporary sealing with roofing cement, waterproof tape, or even a flashing patch kit can take time until a proper repair is done. Damaged sections of flashing can often be cut out and replaced without redoing the whole system – but only if caught early.
If water has already made it inside the home – staining ceilings, damaging insulation, or creating mold – call a professional immediately. Flashing repairs aren’t just about stopping leaks; they’re about preventing long-term structural issues.
Preventive maintenance is far cheaper than reactive repairs. Expect to spend around $200 to $500 per year for professional roof maintenance, which usually includes flashing checks. Small repairs – like replacing a loose section or resealing flashing around a vent – typically run $100 to $300 per visit.
Major repairs, such as replacing flashing around a chimney or reworking valleys, can cost anywhere from $1,000 to $3,000 depending on complexity and roof access. However, compared to the cost of replacing water-damaged ceilings, walls, or insulation, it’s a worthwhile investment.
Flashing is one of the hardest-working components of your roof. It doesn’t get much attention – until it fails. But when it’s installed correctly, inspected regularly, and repaired as needed, it quietly protects your home year after year. Whether you’re building new, remodeling, or just keeping your home in shape, understanding roof flashing gives you the power to make smart, lasting decisions.
If you’re in New Jersey or Pennsylvania and need help with inspections, repairs, or replacements, American Quality Remodeling has been installing high-performance flashing systems since 1990s. We know the weather, the codes, and the best way to protect your home. Get in touch, and we’ll make sure your roof is sealed tight – no guesswork, no shortcuts.


Embark On Your Build With Us!
